The first tutorial is a lovely, quick & simple patchwork cushion cover. It has an envelope back, so no scary zips to wrestle with!!
First of all, here is what you will need:
16x4.5"squares of fabrics in as many prints as you like (you can get 16x4.5" squares from just 1 fat quarter!)
2x 16.5"x11" rectangles of the same fabric for the envelope back

Firstly, cut your fabrics to the above dimensions, making sure to press well before you cut.
Play around with the layout of your squares & take pics of the different layouts so you can easily compare before you sew - they look massively different so it's good to have a reference to look back on!


Right once you've decided on your layout, we will see the squares together in rows. Starting from the top, using a quarter-inch seam throughout.

You will end up with the four rows as shown above.
Now you will need to press each row. You want the seams to go in the opposite direction to the row above. I always press the top row to the left, the next row down to the right & so on

Looks so much better pressed!
Next, you want to join the top two rows together. You will need to "nest" your seams. Basically, this means butting up your seams so that you have no gap or overlap in the seams where the rows meet. Doing this will make sure that each intersection of your squares is clean without a gap:

Once they're nested nicely, pop a pin thrugh each side of the nested seam to hold it in place until it is sewn together:

Repeat for each intersection of seams. You might find that you have a little extra fabric between some squares & not enough between others. Don't panic! Nest your seams regardless. You'll find that as you sew, as the machine pulls the fabric trough these "problem" squares right themselves!
I always pin slightly diagonally as shown, as this goes through both sides of the seam and also makes the pins easier to remove as they near the machine foot.

Now, sew the rows together with a quarter-inch seam.
Open out & press seams UP.
Repeat with the bottom two rows & this is what you will have:

Now, sew the two rows of two in exactly the same way. Press the seam UP again

Now we need to prepare the backing.
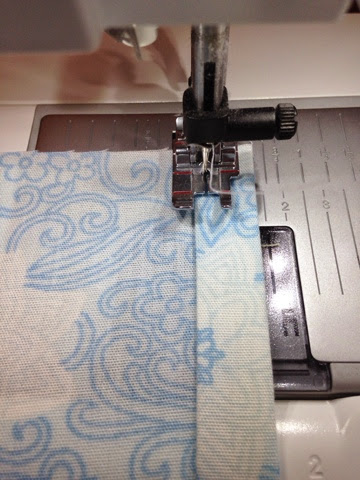
Along the LONGER edge of each of the backing pieces, turn the edge up by about a half inch & press. Then turn by another half inch and press again.

You'll now sew along this fold, close to the upper edge, to give a nice finished edge to the envelope back.
Repeat with the other backing piece.
Now lay these on your cover front, right sides together, lining up along the top & sides. Place the top piece on first (folded edge in the middle):

and then the bottom piece in the same way:

Now pop some pins to secure in place, especially at the corners & over the folds on the backing pieces

Now, sew around all the edges with a quarter-inch seam. Back stitch (you should have a button or lever to do this on your machine which you may need to hold while you complete the back stitch) over the opening folds, as these will get the most strain when you take the cushion pad out & put it back in.
At the corners, see to about a quarter-inch from the edge & turn.

Once you have sewn around the cover, you might want to "finish" your edges by sewing a zig-zag stitch around. This looks nice and also stops fraying & strengthens your seams up a bit too!

Now turn inside out & you'll see your finished cover!
Give it a good old press, fill with a 16" cushion pad and LOVE it forever!

No comments:
Post a Comment